Wednesday, July 26, 2017

Mermaid Tag

I signed up to make a mermaid tag in one of my facebook groups.
I love how mine turned out
I used some teal wood grained paper for the background. I added the teal pearls to the top. The starfish is from a swap, I put a blue eyelet on it with some fiber for the string. The starfish at the bottom are from a sticker sheet from Hobby Lobby. I didn't like any of my mermaid stickers, they were too cartoony, so I made my own. I started with the fish scale looking paper and made a tail and then went on a hunt for a picture that fit the tail. In hindsight, I should have found a picture first and then made the tail. She was holding a child, so I cut out the child and part of her arm, I put some 3D flowers to cover her arms. I have an orange egg as her chair and then I found this 'rock' (I don't know what it is) it was in my stash and liked that as her chair better. She still didn't look like a mermaid to me, so I added the sequin 'crown'.
We had to have texture and something shiny. I feel my rock works for the texture, and the sequin crown works for the something shiny.
Here's what I got in return:
 I like the paper she used.
Here's the back:
It's a cute quote.

August Calendar Tag

I signed up to do a July Calendar Tag in one of my facebook groups, when I printed off the calendar for July, it also had all the other calendars for the rest of the year, so I figured I might as well do those tags as well.
Here's my August one:
When I think about August, I think about vacation and that one last chance to get away before going back to school.
I used some blue cardstock as the background, I added some word paper on top of that with a wave sticker at the bottom. I added some flip flops, swimsuit and ice cream stickers on top of that. The August calendar is on the top. I wrote Vacation time on the side because I didn't have any alphas with enough letters to spell it out.
Here's what my partner sent me:
I'm not sure how I really feel about this one.
 And the goodies:
I like the small notebook. I thought that journaling card at the bottom said read, which got me thinking if there was a reading themed journaling card set, I'd totally buy it.

Monday, July 24, 2017

Your Style Swap

On one of my facebook groups, I signed up for a swap where we got to pick what to send.
I decided to go with a loaded bag and fill it with goodies.
The front:
 I covered it with paper from the Newsworthy paper stack from Hobby Lobby, I also covered the pocket with another paper from the same pad. I added some travel washi to the top, that's also from Hobby Lobby. I cut out an Eiffel Tower that I got in a swap. I added some rub-on flowers from Target and a saying from a journaling card from Hobby Lobby.
The back:
 I added some butterfly ribbon I picked up at a garage sale. I used a journaling card to make a pocket. I added a doily I got in a swap with some tiny heart stickers I also got in a swap. The larger foam heart sticker is from Hobby Lobby.
The goodies:
I filled it with some stickers, stamps, sequins, paper straws, pens, pearl trim, paper clips, washi samples, journaling cards and sticky notes.
Filled:
It looked stuffed to me.
Here's what my partner sent me:
 This is packed. Everytime I look at this loaded bag, I see something else I missed, like the pocket watch chain.
The back:
 The goodies:
Love all the stuff she included. Lots of mini bling and flowers and stickers and the handmade wand.

Sunday, July 23, 2017

Sewing pocket letter

I signed up to do a sewing pocket letter in one of my facebook groups.
My original plan was to have some rose trim at the bottom, but I accidentally dropped in on my pocket page and got hot glue all over, so I had to re think my pocket letter. I put the little girl fabric to cover up the glue and the green trim to go with the fabric.
I was also going to use the paper that's on the back (you'll see it further down) as my background paper for the front and go more vintage.
I still turned out vintage, but I'm not sure I like the plain pink paper for the background. Here's what I made:
I glued all the mother of pearl buttons on the top and added the 'buttons' word to make it look like a vintage button card. The thread bobbin is a sticker, I actually added some twine to the back of this pocket. The sewing machine image is from a swap, I added some 'measuring tape' washi to the bottom with a thimble button.
The middle row is images of dress forms, the two on the left and right are from a swap. On the bottom I have the little girl fabric and the green trim, I also added the wooden mini ruler to the side.
Here's the goodies:
I tried to make them all sewing themed. I included twine on thread bobbins, sewing themed washi, a sewing themed paper clip, some ribbon, lace and buttons.
We had to decorate both sides:
This is the paper I was going to have on the front.
I think it still turned out nice, just not what I had planned.
Here's what my partner sent me:
 Here's the front:
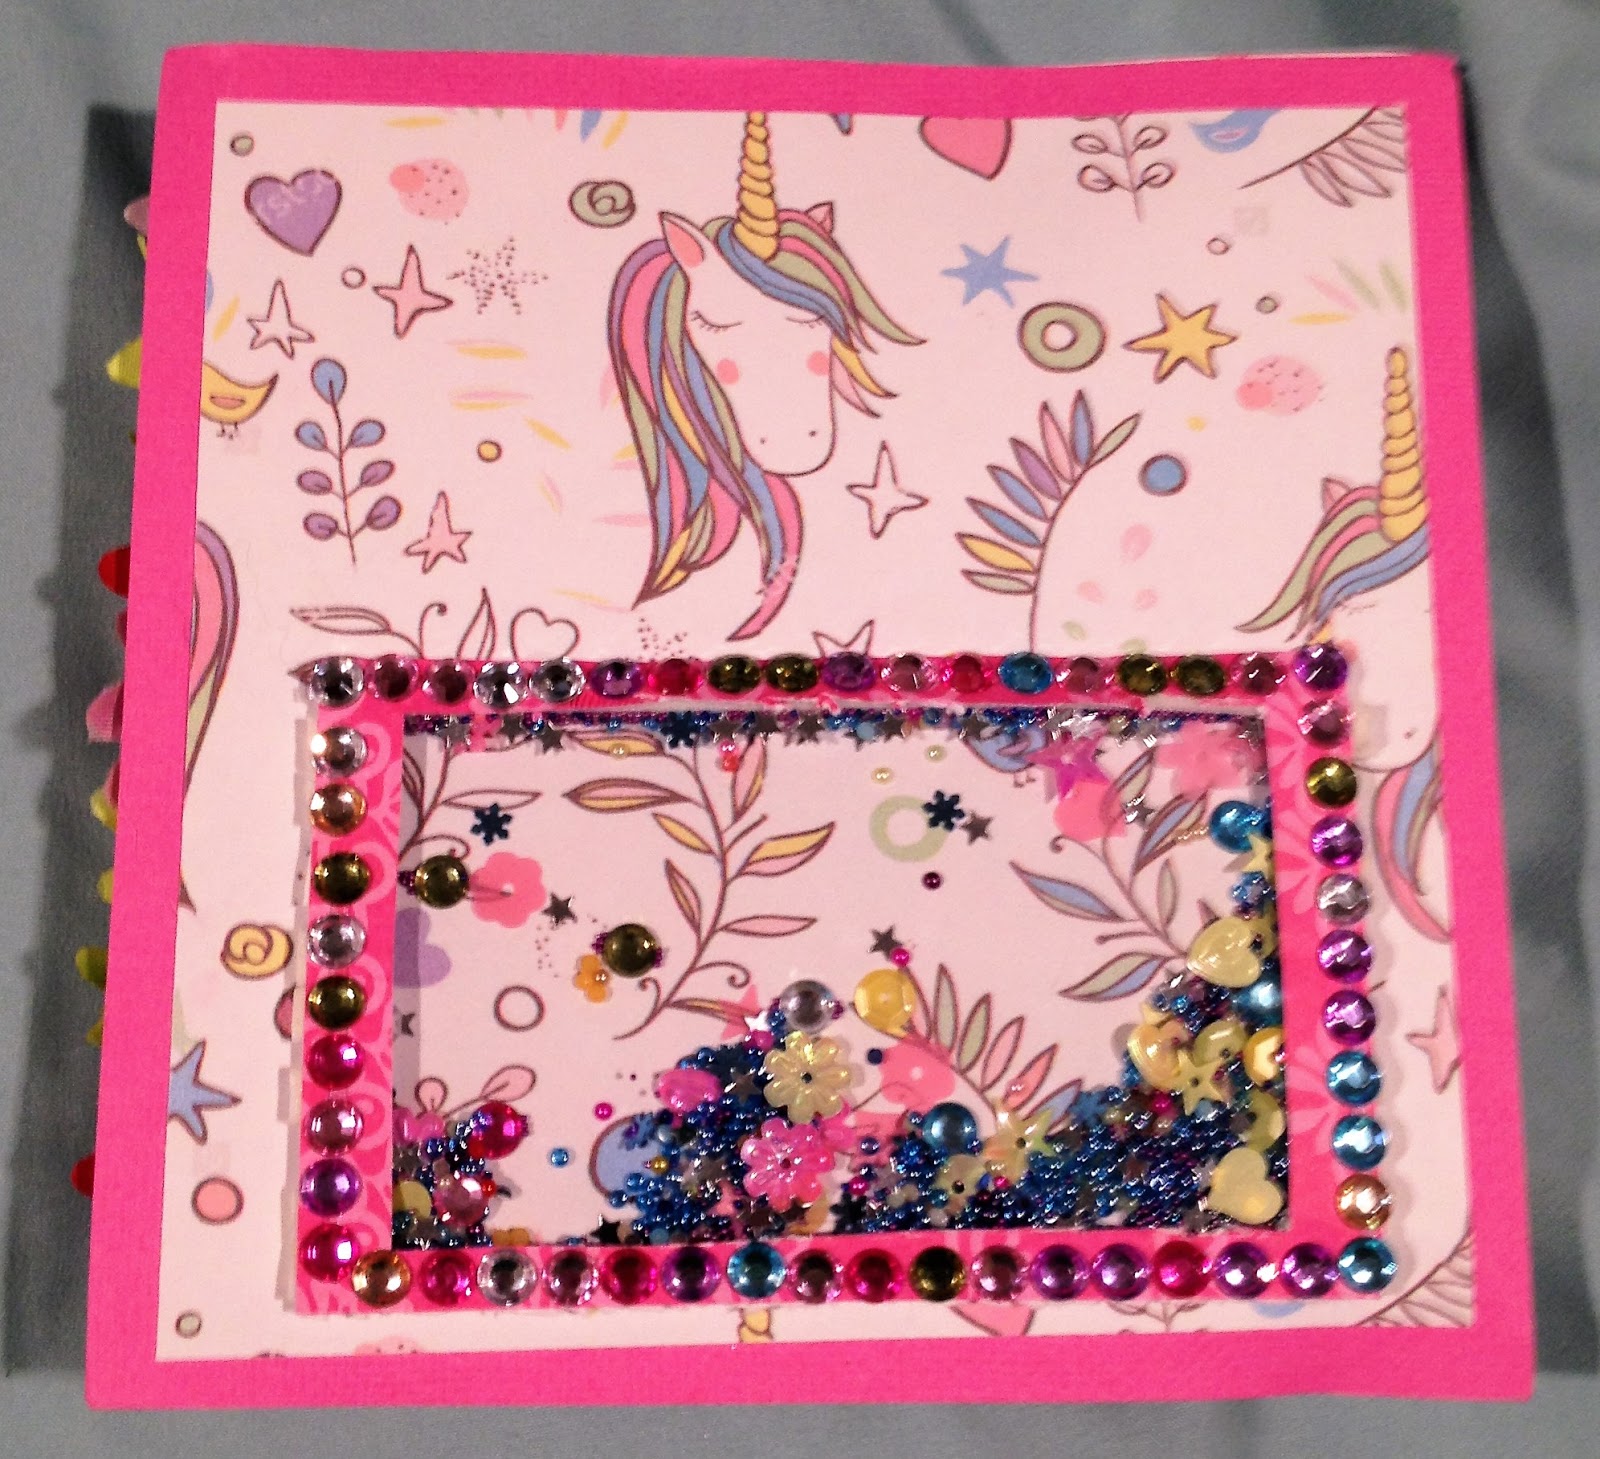
 I love that she sewed on some of the pockets and that she made it vintage. I do love the trim on the side, but I can't put it in my binder, because I don't know where the holes are.
The back:
 She included quite a bit of mini bling.
The goodies:
Lots of good stuff, I'm wondering if that ruler on the top was originally glued to the side of the pocket letter.

Saturday, July 22, 2017

Unicorn flip book

I had signed up to do a flip book swap on one of my facebook groups, see this post, she was going to send me a unicorn themed one and accidentally sent the wrong one. I got this one in the mail the other day.
Front:
I love the background paper and the unicorn, it's tail kinda looks like raffia.
First spread:
The girl on the right, is actually a stamp. I love how she used bright colors with buttons on the right.
Second spread:
Love the butterfly. The right side is an envelope.
Third spread
It has a sweets theme, very cute.
Fourth spread:
The pocket on the left has journaling cards in it. I really like the page on the right.
Fifth spread:
The left page is a mini file folder and the right page flips open.
Sixth spread:
I also love the unicorn on this one and the bright colors on the pocket on the right.
Seventh spread:
The right side has a wooden frame and flowers.
Back:
This isn't exactly the back, but it was in the box with the book. I love the background paper on this and the shaker as well.
I'm very happy that she made and sent me this one.

Friday, July 21, 2017

Pink and black envelope flipbook

On one of my facebook groups, there was a swap for a pink and black envelope flip book. I chose to make the one that had multiple envelopes for the base. I covered the envelopes with black cardstock and added strips of pink paper with white polka dots to cover the rest of the envelope. I accidentally cut the black pieces too small on the outside so I added some washi to the seams between the envelopes and some more on the top and bottom.
This is what it looks like all folded up:
 Here's what's under the flap:
 The banner is a wooden tag from a swap, the 'hello' is alpha stickers from my stash. The bicycle is a die cut someone sent me.
When you flip this open:
 I made the inside vertical and the outside horizontal.
Close-up of right side:
 I used a lot of journaling cards and then just added embellishments. For this one I added some bling to go with the card.
Close-up of left card:
I didn't add any embellishment to this one.
When you flip it:
Close-up of middle card:
 I added some sparkly foam flowers to this one.
Close-up of left side:
I actually lined the background with some black washi and the background, and then added the journaling card on top.
When you flip it:
 Close-up of third card:
 I added some sparkly heart stickers.
Close-up of last card:
 I just added an envelope with my note in it.
Back of flip book:
 I cut this heart out of a journaling card.
Goodies:
I tried to keep them kinda flat as my flip books never close. Journaling cards, tags, stickers and a bookmark.
I made the second card from the left. The tag base was given to me in a swap, I added the vintage looking sticker and the washi to it.
Here's what my partner sent me:

It's very plain and not very black to go with the pink and black theme. But, it also looks kinda like a clutch that you'd carry with you on a night out. I'm just not excited about it.

Screw It and Do It Challenge, last day

Day 15:
 Pink background, houses from a journaling card, lawn chair sticker, bunny sticker, hello sticker, butterfly sequin, lace on top.
I'm not sure how I feel about this one, I feel there needs to be something in the middle, but I don't know what.
So, today was the last day of the challenge, here are all my cards:
I think it was a fun challenge, though some days it seemed more of a chore than fun. There's only two cards I'm not really excited about, the one with the foam animals, and the one with the stamping, they're just too plain for me.
Most days I just used the scraps on my desk (there's a lot of scraps on my desk), I didn't really have a plan, sometimes I had a starting point, and then everything just came together. 
I'm tempted to keep going, I'm guessing my group might do it again, as they were doing one when I joined the group. My original plan was to make the index cards and send them out with some of my happy mail, but I kinda want to just collect them all somewhere, but I'd probably never look at them again. I don't know, maybe I'll keep my most favorite ones and send the rest out. If you're interested in one, let me know.

Thursday, July 20, 2017

Mermaid pocket letter

Someone sent me this die for my birthday
but I don't have a die cutting machine, so I did a private swap on one of my facebook groups, I have so much stuff, so I just asked her to make me a mermaid pocket letter.
This is what she sent me:
She said it's her favorite pocket letter.
I'm not a huge pink person, but I LOVE this pocket letter.
She also filled it with goodies that I like. Usually there's something in one of the pockets that I don't like, but I love all the goodies in this one.

Screw It and Do It Challenge, Day fourteen

Day 14:
The background is just a piece of paper from my desk, I added the washi on the bottom because the blue paper wasn't quite big enough. I wanted to use this Dollar Tree lace sticker, so I put it on some pink paper and cut it out (that took most of my 10 minutes). I added it to the sparkly green egg and put a Hobby Lobby sticker.
This one is OK, it was kinda just putting a lot of things together and hope they looked good.