Saturday, September 30, 2017

Fall pocket letter

One of my facebook groups had a fall pocket letter swap, so I signed up. Here's what I created:
 I used orange card stock and patterned paper as my background. I had all these silk leaves from last year, so I added those. I then put a bunch of pumpkins together on top of them.
First row, first card: see through orange pumpkin from a swap, glittery pumpkin from a garage sale, copper pumpkin from Target. Second card: foam pumpkin from a swap, glittery pumpkin from a garage sale, copper pumpkin from Target. Third card: see through orange pumpkin from a swap, glittery pumpkin from a garage sale, copper pumpkin from Target.
Second row, first card: felt pumpkin from a garage sale, glittery pumpkin from a garage sale, copper pumpkin from Target. Second card: white pumpkin from my stash, orange pumpkin from my stash, glittery pumpkin from a garage sale. Third card: foam pumpkin from a swap, glittery pumpkin from a garage sale, copper pumpkin from Target.
Third row, first card: foam pumpkin from a swap, glittery pumpkin from a garage sale, copper pumpkin from Target. Second card: orange pumpkin from my stash, glittery pumpkin from a garage sale, copper pumpkin from Target. Third card: orange pumpkin from my stash, glittery pumpkin from a garage sale, copper pumpkin from Target.
Here's the goodies:
die cuts, glittery pumpkins, stickers, sequins, silk leaves, tea, more pumpkins. I always try to add some of the stuff I used on the front along with stuff that goes with the theme.
Here's what my partner made me:
 How cute is this presentation? Especially that washi, it also peels off the paper very easily (I will be hoarding that).
 I love the clean and simple look and the plaid and the sunflowers.
I love that cute little mouse card and the leaves.

Friday, September 29, 2017

Autumn pocket letter

I signed up for two new facebook groups one of them had a fall pocket letter that I signed up for. Here's what I made:
 I used some brown cardstock for the background with a more patterned paper layered on top of that. The 'celebrate the season, and the branches came from a sticker book. The scarecrow, wheat, and the fox came from another one. The owls came from a third one. Last year after Halloween I picked up a bunch of sticker books from JoAnn's for wicked cheap. The flowers in the first row are from a garage sale. The leaf toothpicks in the second row are from my stash. The brown sequins and bling in the second row are from my stash. The pumpkins on the bottom row are from my stash. The ribbon on the side is from a garage sale.
Here's what I put in the back:
sequins, die cuts, stickers, table scatter, and bling.
Here's what my partner sent me:
 LOVE the mooses, how cute are they? Also, love how she incorporated the teal color.
She gave me some die cuts of those moose, plus a pie, a truck loaded with pumpkins and a coffee cup. I don't drink coffee, but I love coffee themed stuff, I think it's that cup shape that gets me.

Tuesday, September 26, 2017

Screw It and Do It Challenge 3, Week one

Again, doing the Screw it and Do It Challenge where I create for 10 minutes a day. Here's the first week.
Day 1:
 I had the brown paper on my desk from making a fall pocket letter. The scarecrow and giant acorn are from a swap. The flower brads and ribbon are from a garage sale. The bird is from my stash.
Day 2:
 I love the color of this background paper. I laid the butterfly on there while I was looking for something else and decided I liked how it looked, it's from Hobby Lobby. The 'wonder' is on foam tape, it's from a swap. The buttons are stickers from my stash.
Day 3:
 LOVE how this turned out. The background paper was from a loaded bag, the washi on the right finished covering the paper. I added sequins to the middle of the designs, the washi on the bottom was on the bag that had the sequins, from a swap. The unicorn is from Tuesday Morning. The bow is from a swap.
Day 4:
 I had just read a not so nice message on facebook and was not interested in creating. So, I just got out some paper and stickers. I do like it though. The fox and bee are from a fall sticker book. The butterfly on the left is from a swap. The circles are from Dollar Tree. The butterfly on the right is from my stash. The ribbon on the left is from a swap. The tulip is from Dollar Tree. The flowers at the bottom are from my stash. The jar is from a swap.
Day 5:
 Also turned out cute. I was in a mermaid mood for something else, so I flattened out the net bag and used some floral paper to cover the sides. The bag was from Hobby Lobby, the floral paper is from a swap. The stars are from a swap. The flamingo is the front of a card someone sent me.
Day 6:
 The teal piece is the back of the flamingo card, the triangle paper is from a loaded bag. The washi on the side is from a swap. The butterfly is from Dollar Tree. The flowers are from Hobby Lobby. The 'be lovely' is from Hobby Lobby.
Day 7:
 I like the low color on this. The bird paper was on my desk and just a bit too small, so I added some book looking paper. The birds are from a swap, the book paper is from my stash. The arrow die cuts I got in a swap.
Day 8:
The flower background is a card. I found some washi from a recent swap that matched almost perfectly. I used some green washi to cover the sentiment, that's from an old swap. The heart and 'hello' are die cuts from a swap. The fox is from a sticker book.

Pearls and Lace card

I signed up to make a pearls and lace card on one of my groups. Here's what I made:
 I took a card blank, added some vintage lace, a 'hello' I cut from another card and a strip of adhesive pearls.
Here's what my partner sent me:
I love the use of the fairy.

Monday, September 25, 2017

Halloween pocket letter

I signed up to do a Halloween pocket letter.
I'm not a huge Halloween person, but I found it funny that in my all holidays stack from Hobby Lobby those are the papers I have used the most of.
Anywho, all the characters are all stickers from JoAnn's from last year. The foam word stickers are from a swap. The chevron paper is from that all holidays stack from Hobby Lobby. The orange is just plain cardstock from my stash. I added the Halloween washi to the bottom, it's from Target from last year. I thought it needed something else, so I finished some black jewel stickers from Target from last year.
Here's what my partner sent me:
 I love the black and gold

Sunday, September 24, 2017

Halloween Tag

I signed up to make a Halloween Tag in one of my facebook groups. Here's what I made:
I used some background paper from a Halloween paper pad from Hobby Lobby last year. The tree actually came in two parts, it was on the back of some cut aparts I got in a swap. The raven is also from a swap as is the 'happy halloween' and the 'eat, drink and be scary'. The orange paper is a scrap from my desk.
I'm pretty happy with how it turned out.
Here's what my partner made:
 And the goodies:

Saturday, September 23, 2017

October tag

I signed up to make an October calendar tag in one of my facebook groups, the theme was Halloween.
I didn't have any Halloween patterned paper in the size I needed, so I used some yellow paper and a cellophane bag with jack-o-lanterns I got in a swap last year. Of course it didn't want to stay glued on, so I framed the tag with some black washi and spiderweb wash. The tree was from a swap as was the tombstone and the 'eat, drink and be scary'. The calendar I printed from online.
Here's what my partner made:
 And some goodies:

Sunday, September 17, 2017

Loaded destash bags

I signed up for a loaded destash bag swap in one of my facebook groups. Basically, you took a lunch bag, decorated it, and filled it with destash items. 
Here's what I made:
 I just took the cut aparts from the Pink Passport paper pad from Hobby Lobby and added them on the bag. The background is from the Newsworthy paper pad. The 'lovely day' piece at the bottom was from a swap.
Other side
 I LOVE how this came out. This girl was in the cut aparts for the Pink Passport paper pad. The trim at the bottom is vintage from a yard sale. The butterfly gems are from Dollar Tree. The flower in her hair is from a swap as are the pearl snowflakes on the side.
The second one:
 I'll admit, I wasn't sure how to decorate this one. The background paper is from the Fruit Tart paper pad from Hobby Lobby. I trimmed it wrong, so I just added some green striped washi to finish covering the bag and a 'wish' puffy sticker.
I just added some fruity buttons and paper pieces to it.

Saturday, September 16, 2017

Halloween pocket letter

I had signed up for a Halloween swap in one of my facebook groups, but pulled out due to working so much in August. One of the people in the group saw that and offered to send me one, I told her I could get one back to her, it just might not be that quick.
Here's what I created her:
 The stickers are all from Dollar Tree. I bought the sticker packs and thought it would be really cool to make a pocket letter using just those. I love how it turned out.
The goodies:
 monster notebooks from Target last year, stickers from Walmart last year, table scatter from Walmart last year, stickers from Dollar Tree this year, a jar hanger thing from a swap, sequins from a swap, stickers from Dollar Tree this year, Tim Holtz Halloween ephemera.
Here's what she sent me:
 I think it's so cute. I love it!!!
The goodies:
She sent me a bunch of stickers.

Saturday, September 9, 2017

Scavenger Hunt pocket letter

A new pocket letter swap I signed up for was a scavenger hunt. We were given a list of 12 items to find and create a pocket letter from.
My list was:
1. Red paint chip
2. Green heart
3. Business card from a dentist office
4. Gold penny
5. Live rose petals
6. Your town's official seal
7. Receipt for 30 cents
8. Coupon for $1 off
9. Three seeds
10. Christmas ribbon
11. Blue dot
12. Red boat
I thought I had to find all 12 items and create the pocket letter with them. We actually only needed 9 with one piece on each card.

I found the paint chip at Walmart. The green heart and Christmas ribbon was from my stash. I went to a dentist office for the business card. I spelled out penny with gold alphas (mostly because I didn't want to waste a penny). I went to a local garden for the rose petals. I cut my town's logo out of an ad. I found the coupon on my floor. I found the seeds on my way home from work. I used a paper punch for the blue dot. The boat I just colored red. I couldn't find the receipt for 30 cents, I found a few things that cost 25 cents, but I didn't want to buy them just to get the receipt. I put made two cards that had two of the items on it (I wanted to include as much as possible, and I at first thought I had to include them all). The sixth card has my town's logo and the coupon for $1 off. The ninth card has the three seeds and the red boat.
My partner's has disappeared in the mail. We're not sure if I'll ever get it.

Unicorn/fairy mini pocket letters

I've really embraced the unicorn/mermaid thing. I feel I've done a lot of mermaid art swaps, but not so many unicorn ones, so I signed up for a unicorn/fairy mini pocket letter. I'm generally not a huge fan of the mini pocket letters because I have to cut apart my pocket sleeves and they're so much smaller (which I get is the appeal), but I like to create a whole page and put a bunch of goodies in them.
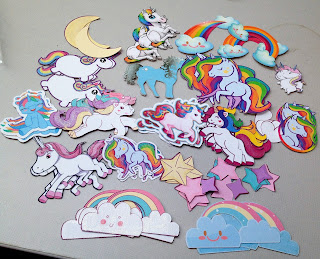
I wished for unicorn ephemera on one of my facebook groups, and they sure delivered:

 Sadly, I found out I could not find fairy ephemera anywhere. I looked at Walmart, Dollar Tree, and Hobby Lobby (I probably should have checked out JoAnn's). I found one sheet of very large fairy stickers at Dollar Tree and bought them (but ended up not using them).
Here's what I made:
 For this one, I just cut out some random papers for the backgrounds, then I added these springy tags I got at Target at the beginning of spring but never used. The two fairy stickers were sent on a card for something else, I peeled them off very carefully and put them on the tags. The unicorn is actually Lisa Frank it's from a sticker book from Dollar Tree. I also added some heart washi and a blingy flower trim to the bottom. I stuck the tags on with foam tape with the idea that my partner could use them if she wanted.
 Again, I went with plainer backgrounds. The unicorns are all from that bunch that I was sent, I picked out two taller ones to face each other for the ends. The middle one is supposed to look like she's jumping over the fairy. The fairies on the ends were sent to me in a swap, as well as the middle one. I added some sequin birds to the first card, round sequins with bling in the middle to the second one and some sequin butterflies to the third one.
I already had this sleeve filled with the background paper, so I just added to it. The first card has some stamped fairies that I found in my stamped image bag, they are on mushrooms so I added a mushroom sticker from a swap. Again the unicorns are all from that bunch above, as is the rainbow. The fairy on the second card is also from my stash. I added a felt flower from Hobby Lobby to the last card, and made it look like my unicorn is hiding under it. I saw on a YouTube video that someone had framed their pocket letter in jewels, so I thought I'd try it on this one.
I tried to add a little bling to all of them. I don't have a picture of the goodies, but I tried to add another of the unicorns I used and a copy of the fairies I used. I had also made a few unicorn paper clips from that bunch, and added one to each pocket letter.
Here's what I got from my partners:
The goodies:
 I like the paperclips and the washi. I'm not a big fan of the page flags.
More goodies:
I wish people would ask if you use planner stuff.
And my second partner:
The goodies:
I love all the stickers, and the washi and the pictures and even those I'm not a sequin person, I like this little mix.
And my third partner:
Everything fell out in the envelope and she didn't tell me what was supposed to be decorating the pocket letter. I like the die cuts, the sticko stickers and the unicorn paperclip.

What I want to be When I Grow Up Pocket Letter

I jumped on this pocket letter when I saw the event. It was a what I wanted to be when I grew up long ago when I was kid. I used to collect police officer paper and stickers, so this was a great way to use them up.
I used to want to be a police officer when I was a kid, I got my degree in criminal justice, so I got close, but halfway through college I decided it wasn't really for me. I still don't know what I want to be when I grow up.
Here's what I made:
I really wanted the background to be the focus of the pocket letter, it's a scene of an officer, leaning on a police car. Of course all police officer scrapbooking stuff is policeman. The officer's uniform, which reminds me more of a military uniform that they colored dark for a police uniform and the shiny handcuffs, the hat above the uniform and the shiny badge are all from the same sticker sheet. The larger hat, the cars, the badge, gun and handcuffs in the upper right corner are all from the same sheet. The words are all from the same sheet. I'm a little stuck on what to put as the goodies, I have put some of the extra stickers in there, I'll probably just fill it up with regular crafting supplies.
Here's what my partner sent me:
 She told me she wanted to be a cook, and she is now a chef.
All the goodies: