Friday, December 16, 2011

Vintage Stocking Swap

I received my gifts from Lynn, my partner in the Vintage Stocking Swap. Here's what the box looked like when I opened it:
Full of exciting gifts, here's what they turned out to be:
ATCs she had made, some craft items, clear Christmas stamps, vintage pictures/photos and a cool owl pendant.
A snowman lamp, light up snowman, cute hot air balloon ornament, peppermint bark, a reindeer bag full of mints, and the stocking she made for me.
A tree cookie cutter and cooking book.
Vintage linens and a crocheted washcloth.
And a bunch of bath supplies.


Thank you so much Lynn. To see what I sent/made for her, go here.

Thursday, December 15, 2011

Steampunk Charms

Remember this post? Well, here's what I got in return:
I see some of the names are hard to read, so starting in the upper left hand corner, going across and then starting in the lower left hand corner and going across, here's who I got charms from:
Shelly R, Lisa Jacob, Susan Laura, and Shelly R.
Donnalee, Mags, Deanna Cosgrove, and Stacey Bond.

And there's more. Once again starting at the top left hand corner going across, and then starting at the bottom left hand corner and going across:
"Dr Amy" Spraitzer, "Dr Amy" Spraitzer, M.C. Sparks, and "Dr Amy" Spraitzer.
Claudine Criner, Valerie Brinchek, Debbie Warrick, and "Dr Amy" Spraitzer.

Thank you ladies for your lovely charms.

Tuesday, December 13, 2011

Vintage Stocking Swap

I signed up for a Vintage Stocking Swap. We were to make a stocking and fill it with goodies. My partner was Lynn of Life on the Wiennee Ranch. Check out her blog.
Here's my stocking:
I hand stitched it all, I had a ton of fun making it. The background is from a vintage kitchen towel, the doily was found at an antique mall along with the top trim. The beige circle in the middle of the doily is a vintage clip on earring. I also added a piece of ribbon to hang it, after I scanned it.

The bundled trim, is what I used on the top of the stocking.

The doily is the one on the stocking.

I sent my partner the doll.

I also sent her the owl on the bell. My original thought was to send the whole bell, but as I was wrapping it, I found it was glued on crapily and it popped off, I thought it was cuter without the bell anyway.

I sent her these vintage paper Valentines, she said she collected them.

I sent her everything in this picture.

The striped towel is what I used for the background on the stocking.


I have such a horrible time of taking pictures of everything I send in swaps, so I'm sure there's more than I have listed here. I also included some chocolate. My partner said she sent my package yesterday, so I will post when I get it.


I had so much fun with this swap.

Monday, December 12, 2011

The 12 Days of Christmas...Sorta

My mom asked me to help her make a 12 Days of Christmas artwork for my grandmother. She decided all pieces would be 5"x7", that they would have to have fabric and some kind of sewing on them, and that we would make up the 12 days with things that went along with the song. After making the 1st day, and seeing my 2nd day, she decided she didn't have time. I didn't hear about this until I was halfway through day 4, and then I was just inspired to keep going.
So, here's day 2:
Two shining balls.

It's scrapbook paper for the background, the tree is made from green leather, and the balls are foil candy wrappers. They're kinda hard to see, but there's two sewn snowflakes by the top of the tree.

The next 4 pieces were all created by sewing my elements on to some decorative fabric, which was backed with some quilt batting. I then finished it off by adding something to hang it and using a vintage kitchen towel as the backing and then sewed around the edges. All the sewing is by hand.
4 vintage trims.
I love the two background pieces on this one, the bigger piece, wasn't quite big enough so I had to add the other one. The 3 white pieces I found at garage sales, the red and white one I got in a swap, read about it here. I found some ric rac to use as the hanger for this one.

Day 8:

8 butterflies a fluttering.


The three pewter colored butterflies are charms from necklaces, the silver one and one in a heart are buttons, the orange one is a piece of plastic, the pink/blue one is foam, and the last one is a pin. I used a piece of pink ribbon for the hanger.

Day 10:

10 flowers blooming.


The flowers, with the exception of the two white ones, are all from vintage hankies. The white ones are from vintage trim. I used a piece of vintage pink seam binding for the hanger.

Day 12:

12 buttons gleaming.

All the buttons are vintage mother of pearl buttons. The fabric is a satiny fabric, I don't know why it looks like that in the scan. I used a vintage beige seam binding for the hanger.


I was planning to do day 6 and then go back and do the odd days for myself, but I ran out of steam. Maybe some day.

Sunday, December 4, 2011

Steampunk Charms

I joined a steampunk charm swap in one of my Yahoo groups. I'm not entirely sure how to make steampunk charms, but I love charms. I was also trying to make them out of stuff I had. Not such a great idea. I understand steampunk to be metal, lace, keys, gears, stuff like that. Unfortunately, I don't have a drill, and I don't have a lot of metal elements. I do have a lot of bullet casings, but like I said no drill. So, here's what I came up with:
The metal tags I got at a garage sale last year. On the other side they say "Crawford County Iowa, a number and 1980 dog tax". The keys were brads that I snipped off the poky parts, glued them onto the tag, and then wrapped them with some coppe wire I found in a clock.
Personally, I think they're great. I asked the hostess if she thought they would work. She replied back "I think they are fine if that's how you would like them to be". That didn't sound too promising to me.


The last picture is my 2nd attempt, but I thought people might not think of them as steampunk, so I went the easy way out. The background is green leather, I just glued some images to them.


Here's my 2nd attempt:


I thought it would be cool to make a steampunk costume. I traced a dress form chipboard piece onto some green leather, freehanding the arms, and cut it out. I then added the black lace on the bottom, and the brass pieces to the arms (they're actually tiny clay beads cut in half). I then added the gold top piece (some packaging), and the 'belt' (some of that is copper colored German trim, some of it is silver trim colored with alcohol inks, and one piece is some copper colored pearls). I think they're really cute, but I was afraid people wouldn't see them as steampunk.


So, now I have 8 of those little dresses. Anyone fancy a trade?

Friday, December 2, 2011

Button Floozies Ornament Swap

In my last post, I showed you what I made for the Button Floozies Ornament swap. Now I get to show you what I got in return:
This cute little stocking came from Terri Wilkerson, it also came with all the fun goodies in the picture. I love the stocking idea, and the buttons are soo cute. I'm getting to be a big fan of the low color Christmas decorations (I just made a low color stocking for another swap I'm in).

This cute tag is from Susie A. I love how she decided to use a dress form, very cute.

And this little beauty is from Joni Reinhart. I love the idea. I would have never thought of making a little person. I also love the sparkly button.


Come back tomorrow for a post on some steampunk charms I made for a swap, I'll also have something for trade if anyone's interested.

Tuesday, November 29, 2011

Christmas Button Floozies Swap

Because I love buttons so much, I'm following the blog Button Floozies. They've have two swaps so far, the second being the Christmas Ornament swap.
Here's the definition of a button ornament from the site: Definition of a button ornament:
A Christmas ornament made to hang on a tree or to be a small shelf or table accent, that is decorated with buttons. The buttons do not necessarily need to be the only decoration element of the ornament -- but it should be a main or special element of the decoration. Your ornament should be handmade.
I had no idea what to make, then I saw an ornament my mother had made awhile ago in the shape of a heart with buttons on it. That was my starting point. I decided to do a round ornament instead, I first wanted it to look like a wreath, but after sewing buttons in a circle, it needed something else, so I added another button in the middle. Here's how they turned out:
All the buttons are vintage, except for a few on the red wreath, I didn't have quite enough red buttons. We only needed to make 3, as we were in groups of 4, but I made an extra for me, and one for my stocking swap partner (more on that later). I kept the green one for me. I have heard from one person, that they've received their ornament, and I figure others will be getting them soon.
Go 
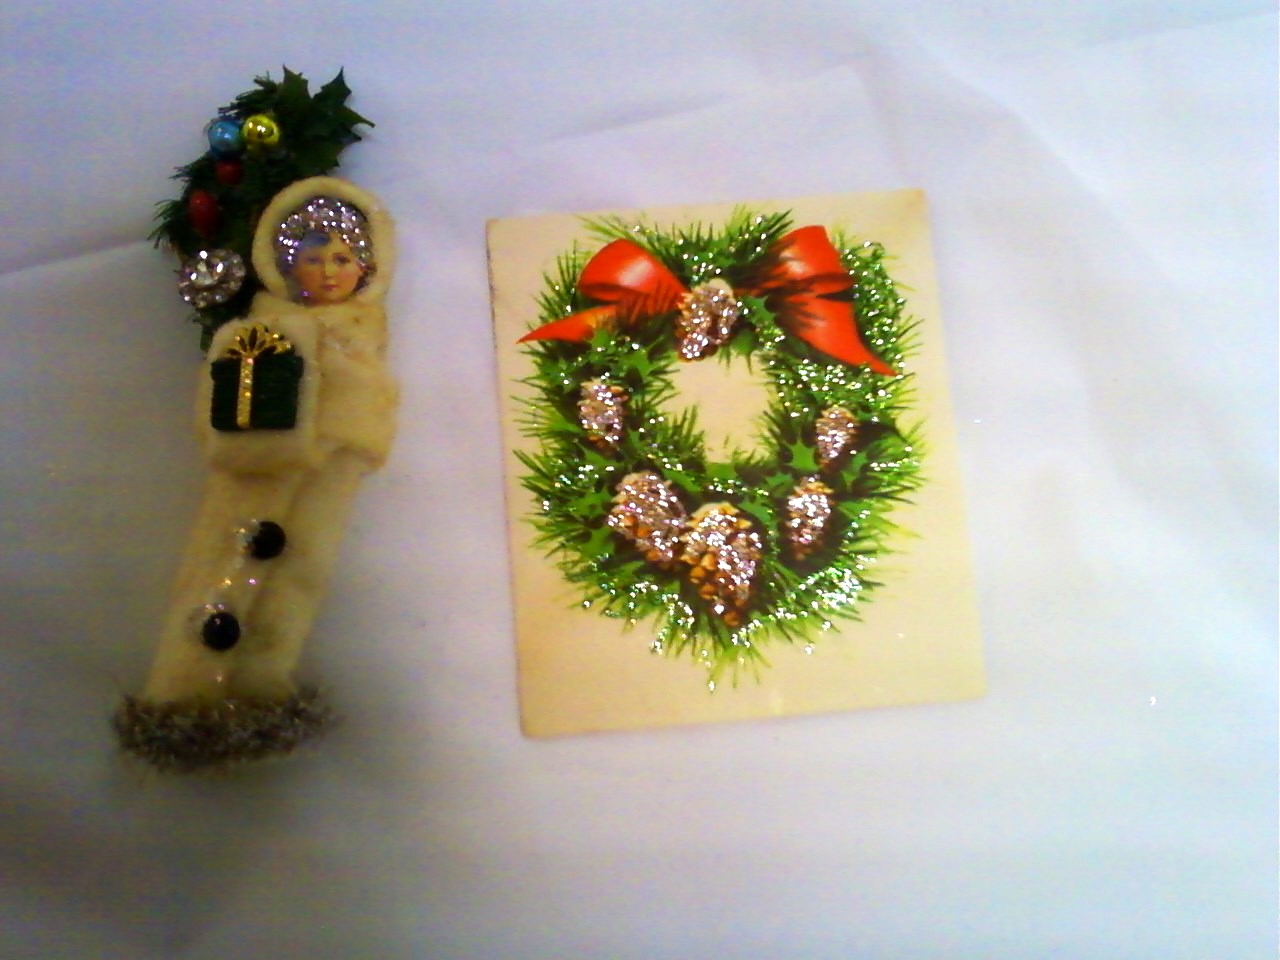
here for the ornaments I received. And go here, to see what other people made and received.

I've also decided I need to join more swaps where I can sew. Between this swap, the pennant swap and the stocking swap (mentioned above), I love hand sewing, it's so peaceful to do while watching TV. After I mail and get word from my stocking swap partner, I will show that. But, I will mention, I LOVE how it turned out (so much so, that I've thought about keeping it and making another one for her. But, I won't).

Maybe I just need to sit down and sew more for fun.

Monday, November 14, 2011

Pretty Pennants

Apparently I don't have just one post on how I did these, so here it is. I signed up to do a Pretty Pennants swap for my The Sum of All ATCs Yahoo group. We had a pattern to follow, and we had free range otherwise to make them however we wanted with some type of hanger. I originally planned to make mine out of vintage hankies, but since the pattern was from an 8.5"x11" sheet of paper they were too small.
So, I decided to use a vintage scarf I had. I cut out 3 pennants and glued them to some quilt batting.

My original thought was to sew on the vintage buttons at the top, one of these has 4 hole buttons. Then I added the crocheted circly piece and the green button.

I was going to sew ric rac to the edges, but couldn't find any vintage pieces for a price I was willing to pay. The trim I ended up using I got at a garage sale. I had the hardest time figuring out how to finish them.

I finally just decided to sew around the edges. I decided to add ribbon to the corners for the hanger. The ribbon also just happened to match pretty well in color.

This is my back, this one's a little messier than the ones I mailed out, because I figured out the ribbon thing after sewing the back on. The ones that I mailed out have the ribbon in between the felt and the front. I also added a little tag on the back with my information on it.

These turned out to be made with mostly vintage items. Everything on the front: the scarf, circly thing, buttons, and trim all came from garage sales. The ribbon I got in a swap. I used new quilt batting, felt and thread.

I've been meaning to do some kind of sewing with my vintage stuff, and this is a great start. I have more vintage pieces I hope to sew with in the future.

Pretty Pennants

Remember this post? I made these great vintage pennants for a Pretty Pennants swap for a Yahoo group. Here's mine again,
And here are the two I received:

This one's from Barbara DeLisle's, I love the stitching on this one. Such a beautiful ues of the little touches of color and beads.

This one's by Iris B (no blog). I love the way she embellished the paper with glitter and gemstones.

Tuesday, November 1, 2011

Merry Moos

I signed up for a swap called Merry Moos on TheSumOfAllATCs Yahoo group. A Moo is a card that 1"x3". These were supposed to be Christmas themed and have a way to be hung.
Since I collect snowmen, when I think about Christmas, snowmen are the first thing to come to mind (I hope no one in the swap minds). I took some holiday paper, cut it to size, and glued it to cardstock with the patterned paper on the outside for a thicker card. I added these little plastic icicles to the bottom. I stamped a snowman on some snowflake paper. I cut the poky pieces of the backs of some star brads and glued them on the top. There is a white eyelet with some white raffia for the hanging portion. The last Moo with the diamond dangles is mine because I ran out of the icicles by the time I got to mine. You can also see I ran out of the raffia and had to use some silver cording.

For the backs I just typed up the name of the swap, the hostess, my name and my email. Then I printed it out and glued it to the back.


I kept putting these off, because I kept thinking 'They're not due until November, I have plenty of time'. Then today I got an email reminding me of when they are due, and realized It's November. I decided I needed to get them done.


What are you all working on?

Monday, October 31, 2011

Question

So, I'm hating blog with embedded comments. You know those ones that when you click on the post, or post a comment, it goes to a page with the post and then the box for the comments at the end. For some reason, when I go to post a comment, after I type in my comment, I've had to copy my comment, because when I click on Google Account, it goes to a page saying my current account is not authorized to view this page, click here to log into another account. So, I log back in with my google account, and then I see my comment with my avatar picture and the word verification. After typing the word verification, and pushing publish I go back to the page about not being authorized to view that page. I log in again with my google account, and finally my comment is published.

Is anyone else having this trouble, and would anyone know how to fix it? It's becoming annoying, and I want to leave comments a little more quicker. Now, I'm not having any problems with the blogs that when you click to post a comment, it takes you to a full page of comments, or the little pop up page.

Any help would be great.

Sunday, October 30, 2011

Fall Cards

This month, the theme for my CollageATCs Yahoo group was Fall. I generally don't make mine until I get the other group members and then I can get inspiration from them. Well, I've had my craft stuff all other my floor for awhile, so I figured I'd just go for it. Here they are:
I got ideas for the two on the left from the cards found below. For the third card, I found the brown sparkly leaf on my floor and based everything off that. Everything but the leaf was from the collage pack.

This card inspired the brown card above. I thought about doing a pennant like theme with the leaves being the pennants. All the leaves are from the packet, and the word is from some stickers I bought. Unfortunately my word stickers must be kinda old because I am having the worst time getting the sticker to stay. I found the above pennant card in the 2011 January/February issue of Papercrafts magazine.

The sunflower card was inspired by this one. I like how I paired the golden colors together. The sunflower is the only piece from the packet. I also found the bird card in the 2011 Jaunary/February issue of Papercrafts. In the magazine, it's a color challenge, but I loved the sketch for the card, so I just went from there.


Next month's theme is buttons.

Friday, October 21, 2011

Button swap

I signed up to do a button swap through the blog, Button Floozies. My partner was Victoria of Things I learn from Bear. We had to decorate an Altoids tin and fill it with buttons and send it off to our partner. Here's what I sent her:
The top is decorated with some metallic papers. Starting in the lower left hand corner and going diagonally up, here are the embellishments: a metallic fabric flower with a faux pearl flower in the middle; a coppery/fabricy flower with faux pearl beads in the middle; and a flower pin that I trimmed the back off of.


My favorite thing to do lately is cover things in dictionary paper, so that's what I did with the sides and the bottom of the tin.


I just looked through my pictures and realized I never took a picture of the buttons I sent Victoria, oops.


Here's what I got from Victoria:


A beautiful button necklace with a nice orange flower, and my Altoids tin. I believe she decorated it with popourri, it smells so nice.

And here are the buttons I got


These are my favorite buttons:


I love the green ones, cause they're green, love the sparkly ones cause they're sparkly. The big one in the front is my favorite, its some kind of plastic that's been worn on the light parts. The bigger metal one is really heavy.

Thank you Victoria.


Check out other tins and buttons from this swap here.

Grandma's Birthday

This past Saturday(10/15) was my grandma's 95th birthday, here's what I made for her:

The layout for this card I got from an issue of Papercrafts magazine. I layered patterned paper that I cut with decorative edged scissors on the card. The green flower is a chipboard shape from my Secret Santa, it has a sticker that says "Time to make a wish" on it. There are 3 paper flowers with beads in the center as well.
Here's her present:
I started with a white wooden frame. I painted it blue, and then added dictionary pages to it. I then spritzed it with a shimmery yellow spray. The buttons on the side, the glass heart and the button in the middle all match in color. The "9" and "5" are chipboard shapes that were painted a moss green. The flower was also misted with the shimmery yellow spray.

Monday, October 3, 2011

New projects

What have I been doing lately? Or what have I realized I need to get done, now that it's October?
I signed up for a Pretty Pennants swap on one of my Yahoo groups, and realized it needed to be in the hostesses hands by Oct 15th. Last time I posted it, I hadn't quite decided on the edges.
I tried doing some embroidery that waved sort of like ric rac, but it did not look good. Then I remembered these nice tiny trims I got a t a yard sale and attached them.
And once again, blogger has deleted one of them, the third one has little tiny flowers for the trim. Now I need to figure out how to finish the back, take care of the fraying on the top edge and figure out a way to hang them. I have a piece of quilt batting on the backs of them to give them more support, but I still need to actually finish the back and add my information. I think I might just add eyelets for the hanging part. I also realized how empty the top third now looks, but I think the front is actually done.

Next up, I have to do one more ATC for my Yahoo group for last month, the theme was Kawaii, and I have to say it's really not inspiring me.

You totally can't tell that that blob is a cat, I embellished the flower that's on his head.
Here are my other member's cards:


I also have to finish my Altoids box for a button swap I'm doing, and put together the fall packets for my Yahoo group. Sometimes procrastination is not good at all.


What projects are you all working on?