Thursday, June 28, 2018

Lollipop Box kits

I've been getting the Lollipop Box subscription box for about a year now, and I rarely use anything in it. I just open it, take pictures and put it away.
Last Sunday, I thought it was high time I started using it. So, I got them out, month by month and started altering a notebook. I wanted to do a tag flip like I've been seeing people make, but I don't have a lot of tags, and some of the papers weren't all that thick. I made a page for every paper I had. Mostly everything is from the boxes.
August:
 This one had a DIY of a felt bow paperclip, so I used the felt for the base of the pineapple, some green paper from March 2018 kit for the leaves. The banner is stickers from the kit, the large piece was a cut out from the kit. I keep thinking I should add something to the middle of the pineapple.
 This one, I cut out the postcard that we get and glued down the starfish wood pieces at the top.
 This one has a scrap of paper from the previous page with a tag and a bow.
 This one I cut apart the other postcard, the larger circle suns are from from the cut out page. I stamped the small sun and outlined it.
September:
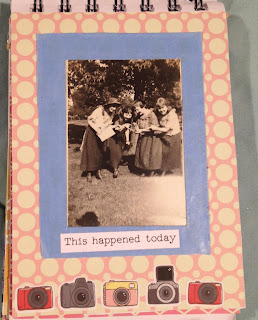
 The kit originally came with a frame, but I used it for something else, so I took a journaling card and covered it with one of the bags from the kit. The photo is from my stash. The cameras were stickers in the kit.
 The filmstrip stamp is in the kit. I had these girls laying around so I stuck them in it. The speech bubbles are stickers from the kit. I'm not really liking them at the bottom. I may or may not change that.
 The squares are actually plasticy tags from the kit I cut down. The hearts are from the cut out sheet. The washi is from the May 2018 kit.
 The notes is a note pad sheet. The red polka dot pieces are washi stickers. The quote was in my stash.
 I cut out the camera from the post card, used the last washi sticker and another word phrase.
October:
 The banner is cut from the cut out sheet, I layered it on some twine from the kit, but sadly you can't see it. The pie was from a card someone gave me. The washi at the bottom is from the April 2018 kit, the burlap looking paper was from the card with the pie, the 'i love pie' was from the kit.
 I covered up my name on the tag with a banner sticker, and just added leaf stickers around it and a pumpkin sticker.
 The hearts at the bottom are from tags. The large heart was a template for a DIY in the kit, so I just covered it with one of the bags from the kit.
 This is cut from the postcard in the kit.
 One of those tags the hearts came out of, some wood buttons, a sticker another tag and another word phrase.
I also used some of the cut outs to make paperclips.
I only made it through October, I planned to keep going, and will sometime in the future, but life got in the way.

Saturday, June 23, 2018

Spring Tag

I signed up to make a spring tag in one of my groups. We had to make a tag that was 3.5x5 or larger, it had to have a butterfly or dragonfly and a flower on it. I was really not interested in making this, not because I didn't want to do it, I've just been having a hard time getting creative lately. I signed up for a bunch of swaps in this one group to get me to be more creative, but it's not happening. I'm staying signed up for them, but I'm not feeling a ton more creative. I did this tag last Tuesday. I was getting my swaps together for my groups and was so excited to be done and then realized I still had to make this tag.
Here's what I created:
 I totally stole the picture my partner posted in our group, mine turned out very blurry. Anywho, this tag came together in like 5 minutes. I already had the tag, I found the doily, the layered flower, the sentiment and the butterfly in my stash. Sometimes I don't have to be creative, I just need to have the right pieces and put them together.
I love how it turned out.
Here's what my partner sent me:
 Love the shabby chic-ness of the tag. It's very cute.
She also included a bunch of extras:

Wednesday, June 20, 2018

July calendar tag

I had a hard time with this too. I think it's because I wanted to do something that wasn't red, white and blue, but in the end I couldn't think of anything else.
I used a red and white striped paper for the background. I saw the pom pom trim on my desk and had to add that with some bling on top. The stars are toothpicks from another swap. The stickers at the top are from another swap as well. Funny thing is, I bought some 4th of July stickers at JoAnn's to use for this and then didn't. I also wanted to use the blue lace and chose it for the tassel.
Here's what my partner created:
I like how she went with summer instead of red, white and blue. I wish I could have done that. This is one of my favorites this year.

Tuesday, June 12, 2018

Pocket letter tag

I'm having a hard time being creative lately. I had to make a pocket letter for a tag on my group.
 I used a background I had done already, added some striped paper and these cute epoxy stickers I found in my stash.
The goodies:
 stickers, paper scraps, sticky notes, washi samples, stamped images
The back:
Thought I'd put something different in the back.
Here's what I received in return:
 It's a little plain. Basically it's black and white paper with stickers on the outside of the pockets.
The back:

Saturday, June 9, 2018

Red, white and blue pocket letter

I signed up to do a Red, White and Blue pocket letter in one of my groups. Here's what I made:
 I had a hard time with this one, I'm not sure why, my first idea was to have some blue paper as a background as well, but it just didn't look right. So, I took the red/white striped paper and added some blue paper to the tops of it. I basically scrounged up all the patriotic stuff I had and combined it on here. The pinwheels at the top I made with stickers and toothpicks, I thought the cards looked a little bland so I added the red, white and blue bling to the bottom. The USA is a diecut someone sent me.
The second row I just added some stickers. The third row has some stickers, a rosette I received in a swap and some stamps I picked up at a garage sale.
The goodies:
 Stickers, a sequins mix I created, some die cuts, a paper clip, some stamps, a magnet and some washi.
I'm still doing the backing them in another paper. I just have way too much paper and I don't think I'll ever use it all.
What my partner sent me:
The goodies:


Tuesday, June 5, 2018

envelope card

I made an envelope card for my boss for her birthday.
Here it is closed:
 And open:
She likes elephants, so I included a lot of elephant things i got in swaps recently and some stickers I had.

Monday, June 4, 2018

Altered Clipboard

I signed up for a different swap in one of my groups. We had to take a large clipboard and alter it. Here's mine:
I was going to go with a Paris theme, but I signed up for a Paris themed tag later in the summer and I don't have a ton of Paris items. The background paper and the girl did come from Parisian themed paper pad, though. That was all I had for my plan, then I added the cloud paper to the top to fill it in and the hot air balloons. I liked the extra texture of the jeweled flowers at the bottom. I didn't know what else to do with it, so I hot glued the paper pad in the middle. I like how it turned out. It's a bit flat, but if someone's actually using it as a clipboard with paper, I didn't want to put too much dimension on it.
Here's what my partner sent:

Sunday, June 3, 2018

Pocket Letter Tag

I signed up for a pocket letter tag in my new group. Here's what I made:
 I already had the background ready. She said she liked quotes, to I went through all my journaling cards and picked out 9 that I thought had good quotes.
The goodies:
 ephemera, stickers, canvas hearts, sticky notes.
The back:
She also said she liked butterflies.
Here's what I received:
 It's so beautiful. She said she read that I liked mermaids, so she went with that. The only downside is the glitter is coming off a bit, but I decided it will be upright in the binder, so it should be fine. LOVE IT!!!
The back:
This is one I didn't want to take apart, it's so beautiful!!!