Thursday, December 21, 2017

explosion box

I made my first explosion box on Tuesday, it's for a friend, so I'll post it next week. Yesterday, I thought it would be fun to make a mini Christmas one because I don't have any 12x12 Christmas cardstock. Maybe mini wasn't such a great idea, I made it a bit harder for myself with measurements because I was set on something. When I fixed it, it was way easier.
The base is from a 6x6 piece of paper, the second one is from a 4.5" square and the smallest one from a 3" square. I love how it turned out.
Here's the top and side of the largest box:
 I used the book of Hobby Lobby Christmas stickers to decorate the boxes. This one has some washi from their $30 box of year round washi. I used some wood grain paper to cover the outside of the box because I have very few double sided cardstock papers. I used some words from some tags I was given for the decorations of the outside sides.
Here it is opened:
 The base is from a 6x6 paper pad from Hobby Lobby.
Medium box:
 I used some red sweater patterned paper for the base that I got in a Peachy Cheap grab bag. The lid is decorated with some gold glitter washi.
Opened:
 Again, just stickers from Hobby Lobby. I noticed that they're not staying stuck very well, I noticed that in a few other places I've used them, so I won't be buying these again.
Smallest box:
 I decorated the outside of this one with some 'postage stamps' from the Winter Wonderland paper pad from Hobby Lobby. I edged the lid with red washi. I made this lid smaller, so as not to cover too much of the box, but it looks weird, I'd tweak that if I made another one.
Opened:
And that's it. It was really fun. I have more issues making the lids than the boxes. Most of the tutorials I saw only made one lid for the largest box. I think it's more fun to open each individual one, so I make three lids.

Wednesday, December 20, 2017

January Calendar Tag

It's time for a new year of Calendar tags. I bought a notepad at Dollar Tree, just so I could have a whole year of these. Funny how a fluke of signing up for the wrong swap got me into these.
 My inspiration was some Paris themed washi that I forgot to put on the tag. I had a napkin with the Eiffel tower on it that I thought would look great with it. I used this flower paper from a Paris themed paper pad from Hobby Lobby for the background. I mod podged the Eiffel tower on top of it. I also added some teal ribbon and some heart lace to the bottom. The calendar is on really thin paper, so I layered it on some cardstock and foam tape. I wrote 'It's a new year' and 'Make it exciting' and added some (what look like snowflakes or fireworks) flat white pieces to the sides.
One of the new requirements is to have at least one embellishment, which kinda defeats the purpose of being able to send it with one stamp, and also makes it a bit more challenging for me. I used to do a bit of mixed media, but I think I've always been more of a paper arts person.
I also created a card for my partner:
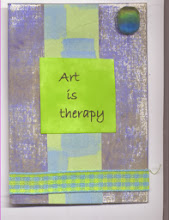
It's very simple, I just took a journaling card (I don't know the dimensions), affixed it to cardstock to make a card. I attached a flat back jewel to the card, and framed it with rose gold washi (mostly because it was crooked).

Tuesday, December 19, 2017

Winter pocket letter

I had to make a winter pocket letter for a swap.
Front:
 I picked up this single sheet of snowflake paper from Hobby Lobby (also specifically for this pocket letter). I wanted to just embellish the snowflakes with other ones on top of the sleeves, but thought I should add a bit more.
I also added the deer to the first pocket. The large snowman is from my day by day calendar, (as much as I've said I don't really enjoy the calendar, there are some cute pictures in it).
In the second row, I used this mason jar sticker (it was originally a shaker sticker, but the outside clear plastic was coming off), with some puffy snowflakes accenting the snowflakes in the jar on the outside of the pocket. I also added the owl with his cute little snow boots.
In the last row, I added the penguin stickers and mouse rub on.
Goodies:
 I added some washi, ribbon, snowmen ephemera, snowflake punches, foam snowflakes, jewels, and a couple snowman paper clips I made just for this swap.
I continued with the hiding of the goodies paper. I had a red paper with snowflakes but I thought this one went better with the colorway of the pocket letter.

Monday, December 18, 2017

Mini wands

I bought some glass rods at a garage sale last year, mostly because I wanted the other glass pieces in the bag. I didn't know what I was going to do with them, until a month or so ago, I made a mini wand, with it being the 'stick'
Every time I cut inserts for pocket letters from an 8.5"x11" sheet of paper, I have a strip of paper left over, so I make a tiny rosette with it. When I made a wintry one while back, I decided to make a wand with it. These have about a 2" diameter.
Here are the fronts:
 You can see, I used the glass tubes for the stems. I honestly don't know what you call those. They all have the same base of the sparkly snowflake ornament, that I bought in an 8 pack from Hobby Lobby.
Close-ups:
 The rosette is made from the backing paper of the snowman pocket letter. I put a snowflake button in the middle and a blue jewel on top.
 This rosette is the background from my winter wonderland file folder pocket letter. I added a snowflake gem to the center.
 This one has the background for my snowman pocket letter scrap for the rosette. I added a foam snowflake (from Hobby Lobby) to the center with a 'peppermint' to the middle.
 This last one has the background from a Christmas pocket letter with another foam snowflake and a 'peppermint'
Here are the backs:
 And close-ups:
 This one has a peppermint tag sticker (from Dollar Tree) on some cardstock and a snowflake ephemera piece to the middle. The glass rod is so thick, that I have to use two layers of foam tape to cushion it. I then use hot glue on top of the foam tape and the rod.
 This one has a chip board circle and some 'snow' paper with a snowflake sticker.
 This one I used another snowflake ornament (from Dollar Tree) for the back, I still used the double layers of foam tape to cushion it. I added a button to the middle of the snowflake, because it had a hole in the middle of it
This is the first one I made and I just squished a flower punch around the rod, so it's not flat. I added a snowflake sticker to the back.
I have two green rods and two light pink/mauve rods left. I'm thinking of doing some kind of flower for the green rods and hearts for the mauve rods.
What do people do with their wands? I just have them collected in a cup on my desk. Sometimes, I pass on ones I've gotten to other people when I think they will enjoy them. Also, do other people make mini wands? I've also put the rosettes on large paper clips, or cupcake pics, too.

Sunday, December 17, 2017

Retirement gift

I bought a mystery box from Hollar in October and received a plastic 'photo collage' frame:
 See it, in the upper right hand corner.
I didn't know what I was going to do with it. I originally was going to take it to work and leave it on our 'free' table.
One of my supervisors is retiring at the end of December, so I took that photo frame and created something for her:
 I covered the frame with some washi that looks like dictionary pages. I covered the background with some polka dot paper. I started with the horizontal frame in the lower left corner. The teacup paper is actually from my day by day calendar. I put the glass back in and attached the Mary Engelbreit stickers to the outside of the frame.
The next frame I did was the other horizontal one. I got this journaling card in a swap, it originally said 'rad', but every time I saw it, I thought it said Read for some reason, so I fixed it with an 'e' sticker. I wanted to add a miniature book to the outside of the glass, but the ones I have were too big for the space. I finally found the lady reading to the kid on the paper in the lower right corner frame.
I bought this paper of pictures of book spines at a garage sale. I bought two sheets, I had used part of one for my director's birthday card, and picked another part for this frame. I layered the 'library' definition from an actual dictionary on some yellow paper and then affixed it to the outside of the frame.
The last vertical frame was the hardest. I wanted to customize it more to her liking, but I admit, outside of the library, I really don't know much about her. I also wanted to do something with 'retirement' in mind. I found this journaling card in my stash, I love the sentiment on it. I added the ticket to the outside of the frame as well.
Here's a close-up of the sides of the frame:
I got this book washi in a swap, the frames in some spots were thicker than the height of the washi, so I added some rose gold washi. There's this tiny square cut-out in the middle of the frame that I also added the book washi too with a tweezers. I knew I didn't have to do it, but I thought it would be a nice touch.

Saturday, December 16, 2017

Winter Wonderland File Folder pocket letter Part II

I hope you're ready to be inundated with posts. I finally got out of my slump and created quite a few things this week.
Anywho, here's what I got from my partner for the Winter Wonderland File Folder pocket letter.
The front:
 The Inside:
 She didn't decorate anything else.
The goodies"
Also, apparently it's a thing to use a sticker on a sheet and then send the sheet to your partner as part of the goodies. I mean, I do that too, but I cut out the empty spot, so you can't tell I just sent you the leftovers. This is the second or third time where my partners sent me the sheet with the empty spots on them.

Snowman pocket letter

I finished another pocket letter yesterday, this time it was a snowman pocket letter:
 The background is from a Winter Wonderland paper pad from Hobby Lobby. My main focal point is that Olaf sticker, I also picked it up from Hobby Lobby with this pocket letter in mind. I added some wintry washi to the bottom. The snowman with the green sweater is from a swap, it's a sticker. The third snowman on the bottom is a tag from Target, I added a green button to cover the hole where the ribbon went. The first snowman on the second row is a tag from a swap. The third snowman in the middle row is a felt sticker from a swap. The first snowman on the top is a journaling card. I added the sparkly foam snowflake with a snowman in the middle. I found the gold sparkly washi in my stash, it was too wide for the side piece, so I used a leftover piece to cover the space between the blue washi and the snowmen on the bottom.
The goodies:
 Tea, more of those round snowmen, washi, foam snowflake stickers, more stickers and a cross stitch snowflake ornament. I changed where my note goes in this one because of that snowman tag on the front.
Again, I used a paper to cover the goodies on the back.

Friday, December 15, 2017

Winter Wonderland file folder pocket letter

In order to get posts up sooner and so they're not so long, I'm posting what I made and what I got in return in separate posts. I also hope it gets me to post the stuff I made quicker.
I'm loving these file folder pocket letters, so am trying to sign up for every one I see. This one was supposed to be a winter wonderland theme, that's whatever I thought of as a winter wonderland:
 I used another manila envelope as my base. I had this tree from a gift bag I picked up at Dollar Tree for another one of these. I just fussy cut it out and added little yellow gems to each of the candle flames.
Inside:
 I had recently bought a pack of mixed loose 12x12 papers at Hobby Lobby, there were 4 sheets of this woodland forest paper in it. I added another one of those hot chocolate treat bags from Dollar Tree to it.
Pocket letter:
 I had picked up this loose page at Hobby Lobby for a different pocket letter, but it didn't work out. It's cardstock with foiled snowflakes. I started at the bottom with the button cut out trees and the foam trees. I added some more trees to the pocket letter cards. The middle just has some winter wonderland creatures. The top has a flying dove from an envelope, some rub on mice pieces and a cardinal sticker. I also added more snowflakes on top of the ones already on the paper throughout. There is a wooden one, some 3D stickers, some gems, some metallic stickers.
The goodies:
 I added some cupcake liners, tea, words, stickers, washi, twine, and some erasers.
 I started doing this with the first pocket letters I made and then for some reason stopped. I'm trying to do it again. I just pick some paper that goes with the theme and use it to cover the goodies in the back. It's not like I don't have enough paper. This one is candy canes from a Winter Wonderland paper pad from Hobby Lobby.
Back page:
 Here's that woodland forest paper again. I put some snowflake straw decorations on it with some 3D stickers I got in a swap. I also created the snowglobe. It's the cover from a sticker book, so I covered up the writing with some woodgrain paper and metallic ric rac. I love how it turned out. I also tried to add some embellishment to the snowflakes so it wasn't so flat. I added some 'Christmas lights' along the border as well.
The back:
I didn't do anything other than add some snowman paper and washi to cover up the folder.
Like I said, I love these swaps and will continue doing them. I think it's a fun way to do a pocket letter.

Friday, December 8, 2017

Christmas Envelopes Swap

I signed up for an advent calendar like swap, I had to make 24 envelopes and fill them with goodies for my partner. We decided to do a small gift for the 25th day.
Here's what I sent my partner, I used a couple different paper pads from Hobby Lobby for the actual envelopes, the plaid patterns are from , the other larger envelopes are made from Christmas patterns from , and the smaller patterns are from . The numbers are cut from a project life journaling card.
Day 1:
 I added the wreath a poinsettia sticker.
Day 2:
I added the clear ornament sticker.
Day 3:
 I added a foam polar bear sticker and some adhesive ribbon.
Day 4:
I added the ornament ephemera.
Day 5:
 I added a tree sticker.
Day 6:
I added a 4x6 project life card and some snowflakes.
Day 7:
 I added some stickers. 
Day 8:
 I added a picture I printed from my computer and a 'home for the holidays' piece of ephemera.
Day 9:
 I added a felt tree and some adhesive ribbon. 
Day 10:
 I added a bunny sticker.
Day 11:
 I added some felt present stickers and 'merry Christmas'. 
Day 12:
I added some stickers.
Day 13:
 I added this cute felt Christmas pudding sticker.
Day 14:
I added this felt snowman.
Day 15:
 I added another project life card.
Day 16:
I added a skating girl sticker.
Day 17:
 I added a rub-on, some snowflake stickers and some flat back pearls.
Day 18:
I added a tree sticker and a raccoon sticker.
Day 19:
 I added the ornament.
 Day 20:
 I added a cupcake liner and the poinsettia sticker.
Day 21:
 I added the 'fa la la' sticker and some adhesive ribbon.
Day 22:
 I added the snowman/santa sticker and the sequin ephemera.
Day 23:
 I added the reindeer sticker.
 Day 24:
 I added a project life card.
 Day 25:
 All I did was wrap the present.
Here's the goodies I sent her:
I added another pack of sequins to the envelope with the snowflake sequins, I changed out the washi for something else.
Here's what I got from my partner:

They are all just patterned paper with washi and a number, so I won't post them all separately. If you're interested in what's in them, check out my other blog, I'm posting every day up until Christmas.