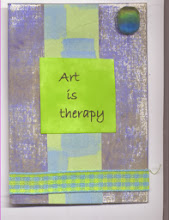
Here's the top:
I had to tweak it a little bit after taking pictures as the paper for the base of this ripped. The main card here is from a journaling card set from Hobby Lobby. I mounted it on some green floral paper and on the top of the box.
Side view of outside:
I put some green checked paper on the lip of the box with some 'it's your birthday' washi tape.
First layer opened:
One side:
I put some blue star paper with a pocket from that journaling card set.
Again the blue star paper with a quote from a journaling card on some blue paper.
More blue star paper with a shaker balloon from the journaling card set.
And more blue star paper with part of a birthday card I got in a swap. The 'happy birthday' banner is from the same card.
Top of second box:
I added two stickers: a balloon and a cupcake. I still felt it needed more, but I never figured out what, so I didn't put more on it.
The side:
Close-ups of inside of box:
I lined all the pieces with this weird black/white green patterned paper for the backgrounds. This piece is a cut apart from a paper pad.
I added some present and cake stickers to this one.
This is another cut apart from the paper pad.
Some star stickers and a 'friendship' ticket sticker from Dollar Tree.
Second layer opened:
Third box:
I added the raised giraffe sticker and the clear 'happy birthday' sticker.
Close-ups of sides:
I layered the same green check paper that I used for the second box lid and the lip of the large box lid for the second layer. This 'tile' piece is an acetate piece that I layered on some white paper and some green paper.This is another cut apart from the paper pad.
This one is the same as the other one.
And another cut apart.
The box completely open:
These are addicting I like making them.
I took this to work to show off to almost everyone, one of my co-workers loved it so much, she commissioned me to make one for her 9 year old niece, I'll post that later this week. After making that one, she showed it to our director, who commissioned me to make one for her friend. Maybe I can get a whole snowball effect going on.
I bought a big stack of 12x12 cardstock to make bases for this, so I'm set for awhile.


No comments:
Post a Comment