Tuesday, December 25, 2018

Believe in Christmas pocket letter

I signed up for a Christmas pocket letter swap. I originally didn't sign up, but they were short a person, so I decided to fill in.
 The background paper is stripes. I used this adhesive ribbon I got at a garage sale for the bottoms. I tried to add something to every sticker I used. First row, first card is just a sticker and then a sticker between the two pockets. I wanted it to say Merry Christmas somewhere on it. Second card: I picked up these poufy house stickers at Hobby Lobby, sadly, they didn't stick very well. I added some snowflakes to the top of the card. Third pocket: this has a chipboard frame on top of a polaroid camera sticker that's spitting out an image of Santa. I added a car with Christmas tree to the frame.
Second row, these are all tags. First pocket: I added some bling on top of red that was on the tag and a star to the top of the tree. Second pocket: I added some snowflake bling to cover the hole in the tag. Third pocket: this tag is from a swap I did a few years ago.
Third row, first card: I added a poinsettia sticker and a twine bow on it. There's a sticker between the cards. Second card: I added a Gifts to buy sticker and a pile of gifts. Third card: I added an ornament sticker with a foam tree in it. I added a mini journal/book to the side along with some sparkly star mini ornaments.
The back:
 stickers, erasers, sequins, wood pieces, sticky notes and an ornament.
Back:
I used some Santa paper.
What I received in return:
 I liked her theme, but it didn't seem very Christmassy to me.
The back was cute:
 And all the goodies;

Wednesday, December 5, 2018

Garland Advent Calendar

I believe this was the first larger Christmas swap I signed up for and then got sucked into the others. This one we were asked to use gift bags, decorate them and make a garland for our partner. I didn't feel like finding gift bags, so I made my own:
 Half of them are made with Christmas paper as the backgrounds and half are not. For some reason, I thought we only had to make 12, and then realized I needed 24. I cut down some Christmas paper to fit on the front of the bags, the 2nd set of 12 that I made has washi on the top and bottom of these pieces due to them being smaller. After making the base, I went back and decorated them, I like them, but I think I would have liked them better if I hadn't done more decorating and just left the larger Christmas papers on the bags. I bought the clothespins plain, and added the bows to them, and then made sure that the opposite color was on the bow as the number on the envelopes.
The second set of 12:
 What I included:
For some reason, I felt that it shouldn't all be Christmas stuff, though there is more Christmas stuff than not.
Gift tag set, bling, handmade ornament, tag, tags, tea, ATC I got in a swap, sticky notes, homemade ornament and tags, pin I got at a garage sale, tags I got in a swap, stamps, ornament, deco tape, mini notebook, tiny doll, clothespins, mini clipboard, pom poms and altered paper clips, washi, hot cocoa, trim, cards, ornaments I got in a swap and an ornament from Hobby Lobby.
Here's what I got in return.:
I don't have a great picture of them. Basically she took a lot of paper and made packages with it. Not a lot of decoration, but that's ok.
Here's the first four days:


Saturday, November 17, 2018

Christmas Advent Pocket Letter

I made one of these last year and then dropped out of the group I made it for, because of things. I proposed the idea to the moderator of another one of my groups and she posted it. The one she suggested was just a 9 sleeve pocket letter, but using a fuse tool to divy up the pockets into more. I suggested using three 9 sleeve pocket letters but just decorating the extra pockets, so people without fuse tools could participate, and because that's what I made last year.
As I was packaging up the one I made last year, I tied it together with ribbon, but then thought after mailing it, why didn't I just make it a file folder pocket letter, so that's what I did this year:
 Again, I took a gift bag and used the front of it for the front of the file folder, sadly when I was attaching it, it stuck in the wrong spot and I had to pull it off making the lower right corner tear. So, I took some wood veneer snowflakes, colored them with a silver marker and then covered them with silver or blue glitter glue. When I first laid them down, they covered the whole bottom, but after putting the pocket letters inside the file folder, it made one side much more pushed up than the other, so I just attached the snowflakes to the more bubbled side. I also added some gems to the middle of them. I was going to add more gems to the sparkles under the sleigh, but then I decided that since the file folder was extra, I didn't really need to.
Inside:
 I covered the inside with some paper from Hobby Lobby. I never know how to decorate the insides, I just stuck a bag and some hot cocoa in it.
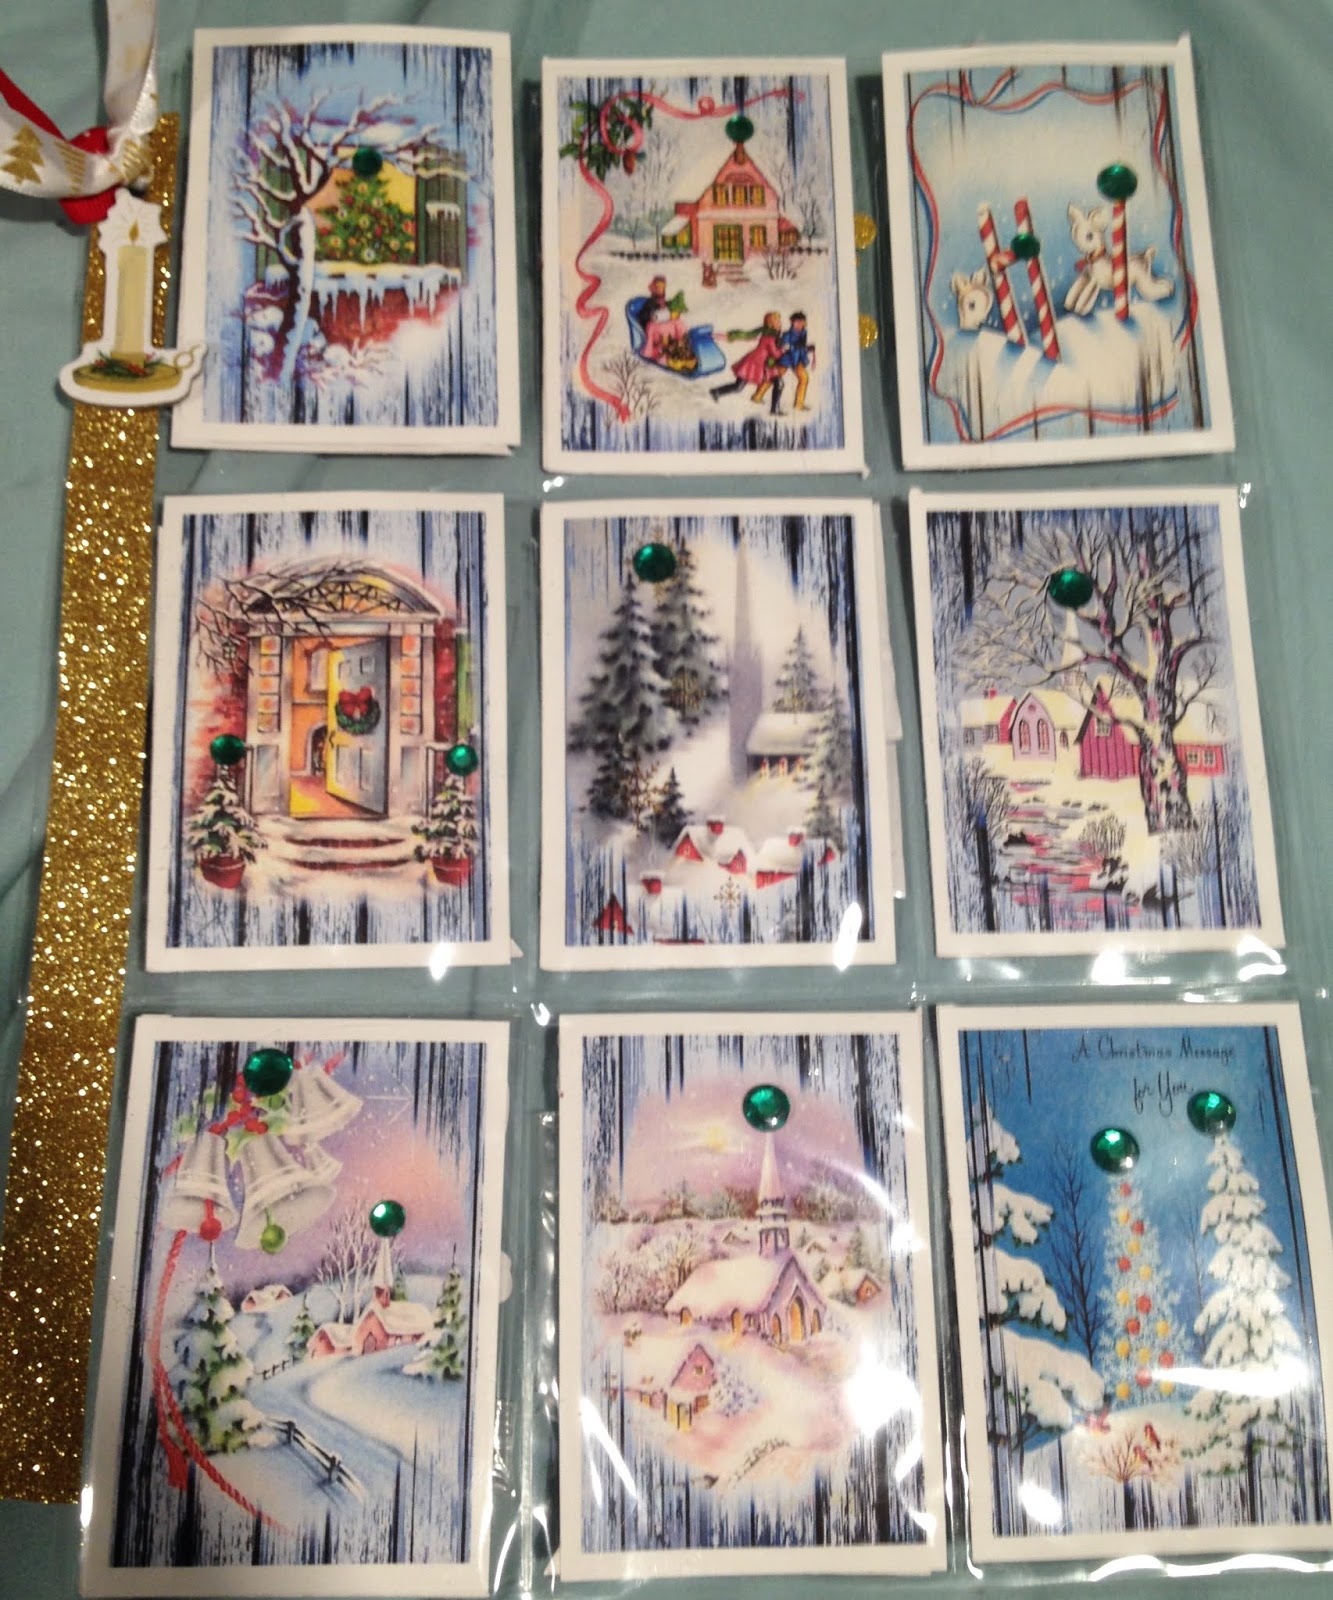
First pocket letter:
I used some plaid paper for the backgrounds on all the pocket letters. I added mostly stickers to either the cards inside the pockets or the outsides of the pocket itself. The candy cane on the first pocket is gems. The 'merry christmas' is from a project life journaling card. The hats are from a Christmas kit. The reindeer is a very dimensional sticker, the merry christmas on the bottom is from a cupcake pic and the snowman is a tag. I had some cute ornament paper that I thought would work to number them, but thought they were a little small when I cut them out, so I just punched some 1" circles to layer them on. I couldn't find number stickers small enough, but realized I had some number stamps in my stash.
Goodies:
stamped images, wooden pieces, brads, stickers, tags, word pieces, tags, tea, tags.
Back:
 I used some letters to Santa paper
Second pocket letter:
I went with a Christmas tree theme for this one. The first pocket has a die cut, the second and ornament from Hobby Lobby. The third, fourth, sixth, and eighth are stickers. The fifth is a tag I got in a swap as are the seventh and ninth. I added some washi to keep the goodies in in transit.
The goodies:
embellishments from a swap, stickers, altered paper clips, shaker mix, stamps, pins, magnetic bookmark, tea. I didn't put anything in the middle pocket as it was very hard to get open with the tag on the front.
The back:
 I felt the plaid on the front wasn't very Christmassy, so I used Santa paper for the back.
The third pocket letter:
This one is a little more Santa themed. The first pocket has a reindeer from a cupcake pic, the second one is a tag, the third a wood piece, the fourth is a sticker, the fifth another wood piece, the sixth is from a cupcake pic. The seventh has a couple stickers, the last two, I used some foam trees to make a scene, I added a snowman button behind them and some snowflakes on top.
The goodies:
die cuts, stickers, wooden ornament, bling, foam trees, sticker, tiny ornaments, Christmas themed stamps. I did take out the candy cane bling because I thought it was too hard to get in that pocket as well.
Back:
Candy cane paper.
Second page of file folder:
 Again, just covered it with paper. I added a little envelope with a note in it.
The card:
 I just made a little 3x3 card with a sticker.
Back of file folder:
I thought this paper was very nice by itself, so I left it alone.
Here's what I received in return:


I want to open it right now. I'm so impatient

Saturday, November 10, 2018

Lollipop box

I've been working on a tag flip like item using the items I received in Lollipop boxes. It started out as a notebook, but every time I added some of the paper to the notebook it would rip a bit at the connection at the top, so I figured I'd still use the paper, but punch a hole at the top and use a binder ring to hold them together. I stopped at October the last time I sat down and worked on these. So I started with November this time, it was a bit harder as I didn't have any of the stickers.
 First page:
 The tag had my paperclip on it, I cut out the quote from the post card and added the jeweled hearts to the top and onto the background paper.
Second page:
 I cut out the banners from the ephemera sheet as well as the hearts. The lace was from Hollar, with a quote from the kit. I added a mermaid sticker from the Dollar Tree in the middle.
Third page:
 The mermazing was from the ephemera sheet as was the tail piece. I layered the mermazing on a scrap of paper and used it to cover my name. I layered the tail piece on a mini doily die cut from a swap and put it on the background paper.
Fourth page:
 I layered a doily from the kit with a die cut from my stash, the blue circle is from the ephemera sheet and I punched a one inch circle from the post card. I added a foam sticker on top of it all. I added a scrap of paper with some sequins from the kit. I added the hello die cut from the kit at the top.
Fifth page:
 The tail is from the postcard, I added the quote from the ephemera sheet. I also added the jeweled hearts to the bottom.
I remember opening the December kit at work, apparently I never took a picture of the full kit.
First page:
 I put the banner stickers on the left and right edges of the page. The banners on the right have heart stickers on them. I also added some wood veneers with some champagne colored flat back pearls.
Second page:
 I covered one of the tags with a scrap of paper and a scrap of the post card. I added the walking, sweaters and hat stickers to it and put it on the page.
Third page:
 All these items are from ephemera sheet.
I created this tag with the idea of putting it on one of the pages, but then didn't like the placement on the pages I had left.
 Again, I covered it with a scrap of paper and added some stickers.
Fourth page:
 I just trimmed the post card down and put it on the page.
January:
 I didn't have the sticker sheet or an ephemera sheet for this one, so it was a particular struggle.
First page:
 I really like how this one turned out. The pink doily paper was from my stash, I just trimmed it down and added it to the corner. The blue pieces are from the post card. The forever is from the description sheet. The captured and hearts were leftover from the September postcard. I added the chipboard frame (peachy cheap) with a baby picture of mine to it.
Second page:
 I cut down one of the bags to put on the background and added some of the postcard. I'm not entirely sure which kit the flowers came from, but I added them to the page.
Third page:
 I went with a tag on this one, too. I covered my name with a piece of tape that held a paper clip on. I punched out the flower shapes (I wish they were suns) from a paper in my stash.
Fourth page:
I found the stickers in the box, but realized later they weren't from this kit, though they worked with it. The word sheet is from the kit.
Apparently my limit is three months, I couldn't get inspired to start February.

Friday, November 9, 2018

December Calendar Tag

It's time for December and my last Calendar Tag. I signed up this year to try them out, but as much as I enjoy getting them in the mail, I have a hard time getting myself to do them, so I won't be signing up next year.
Here's what I created:
I wanted to go with more snowy/winter vs Christmas. The background is just snowflakes and a strip of sweater looking paper, that i trimmed to the wrong dimensions, so I added the blue doily to the top and a strip of washi to the bottom. I had the calendar stuck down but couldn't figure out how to fill the empty space.The sticker of the girl is from another planner sticker book (It's actually from a January sheet), I added the flat back pearls as well. I colored the wooden snowflake with a silver metallic marker and added the gem to the middle.
Here's what I received:
 It's cute, but I feel she didn't follow the rules by having at least one embellishment.
The extras:
This is the last one of these I'm doing. I accidentally signed up two years ago in the middle of the year and only did it this year because I wanted to collect a year's worth, but I feel it was more work than I wanted.